The following pictures are my expirements in making BIOPLASTIC from diffrent materials .
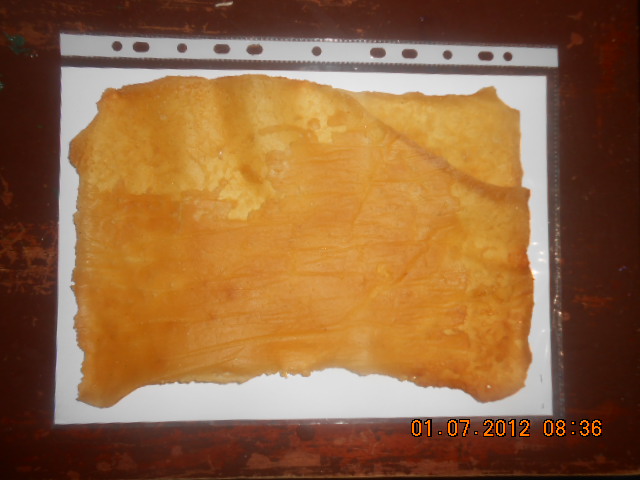
BioPlastics are plastics that can be made out of common household products.
These are to the environment in that they contain no petroleum unlike usual plastics such as tupperware etc. Also instead of taking about 100 years to fully decompose it only takes about 7.
Corn startch Bio Plastic
Ingredients :
Corn starch
-Water
-vegetable/Canola (Optional)
-Wax Paper
(optional)
You will also need a microwave.And measuring tools
Step 2 Mixture
The Ratio I mixed with was 1 part corn starch and 1 part water. Feel free to change this based on the use of your plastic.
For a more rigid plastic, add more corn starch.For a more flexible/ squishy plastic add more water.
I mixed them in a sandwich bag.
If you want to add in some vegetable or canola oil (I used canola) and it will help keep it together a
little bit for every 2 cups of MIXED water and corn starch I added 1 tablespoon of oil. But of course you can change this based on your intended use
of the plastic.
Make sure to get all the bumps of corn starch out you want it to be completely dissolved It should look a bit like milk.
Step 3Microwave the mixture.
For a mixture totaling 2 cups (1 cup water and 1 cup corn starch) I nuked it for about a minute.
This of course could change based on the wattage of your microwave. I believe that mine is some wheres around 1000
to 1400 watts (ya i know thats pretty broad).
If your not sure how long to keep it in for just watch it until it turns to a solid yellow color.
The longer it is in the less flexible it will be but be careful not to leave it in to long or it will become very brittle and crumbly.
WARNING:
BE VERY CAREFUL WHEN REMOVING THE MIXTURE FROM THE MICROWAVE AS IT WILL BE VERY HOT AND MAY REQUIRE 5 MINUTES TO COOL DOWN !!!
Step 4Molding It
What I did was I put a cookie cutter on some wax paper then poured in the BioPlastic mixture before I cooked it. When i realized that it was leaking a
little I just put some tape around it and it was fine.
If you really wanted to get creative you could make a mold out of a microwaveable safe material (fired clay) and you could make some pretty neat containers.
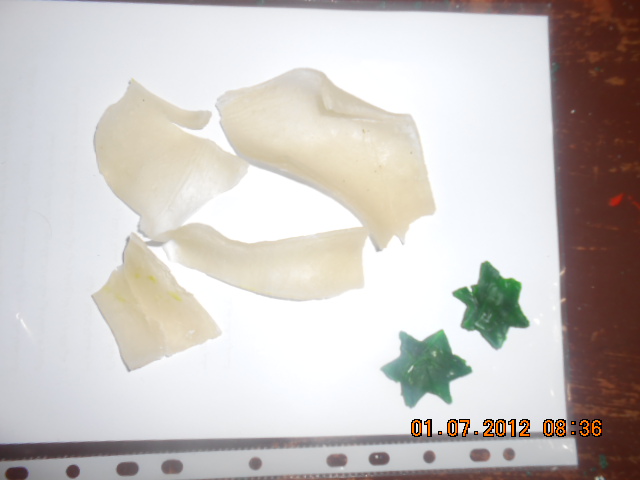
PS . IN all BIO PLASTIC TYPES YOU CAN MAKE COLORFUL ONES BY ADDING NATURAL COLORS WHICH I HAD ADDED EARLIER LIKE THE STARS WHICH I MADE USING GREEN NATURAL COLORS AS PICTURE ABOVE
2 )Most of the materials you will need will be in your house or
can be bought at most supermarkets and home improvement stores.
POTATO BIOPLASTIC
Ingredients:
2 White skinned potatoes OR potato starch OR corn starch
water
100% Vegetable Liquid
Glycerin
White Vinegar
Natural color
Tools / Supplies:
Non stick pan
Spatula or Spoonula
Stove Top or Hot
Plate
Knife or guillotine
Optional:
blender
peeler
filter
casting
compound
Step 2 Optional: Extract the Starch
Now that you have a potato, you might be wondering just how we
will be making plastic out of this? The answer: extract the starch. How will we
do this? BLENDER! Since potatoes are about 95% starch (besides the water),
making a potato into a powdered starch form, is relatively easy.
A note to
younger viewers: be sure to ask your parents if it is alright to use a peeler,
knife and blender, and always use caution when working with exposed
blades.
1) Get a potato, and wash it.
2) Use a peeler to take all the skin
off.
3) Cut the naked potato up into cubes your blender can handle.
4) Add
about 1 cup of water and the cubes to the blender, and turn it on high for a
minute or two.
5) Use a coffee filter to strain off the cloudy water.
6) If you plan on making the plastic right away, drying the mixture is not
completely necessary, but if you plan on storing it for a while, spread it out
on wax paper in a sunny area for it to dry (it could get moldy otherwise).
Heres a suggestion by legionlabs to purify the starch extracted from the potato, by removing unwanted cellulose:
"Given only potatoes, you might be able to increase the purity of the starch for your process by removing cellulose
using this reagent, which can be made from commonly available
materials:
You can reuse the reagent by precipitating the cellulose out by acidifying the
mixture, filtering out the cellulose, and making the reagent basic
again."If you do not wish to make the starch from scratch, you can order
pre-made higher quality starch online, or buy it at your local grocery store.
Corn starch and tapioca starch also work well to make plastic with. On to step 3...
Step 3Mix it Up !
Now that you have gathered all the necessary materials and ingredients, its time
to mix up a batch of potato plastic. A note to younger viewers: be sure to have
a parent with you when using the stove, I don't want you to burn down your house
because of this instructable! Also, beware of the starch plastic resin when you
are pouring it into a mold, it is very hot and will burn you if it gets on your
skin, you can never be too cautious with boiling hot substances.
1) Measure out 60 ml (4 tablespoons) of cold water and pour it into the beaker or
container your heating the mixture in.
2) Measure out 10 grams (or about 1
tablespoon) of starch ( the potato / corn starch you made or bought) and add
that to the water.
3) Add 5 ml or about 1 teaspoon of acid (vinegar) to the
mixture.
4) Add 5 ml or about 1 teaspoon of glycerin to the mixture, more
glycerin will make it softer and more flexible, less will make it harder and
stiffer but more brittle.
5) If a colored plastic is desired, add in the natural food color you desire
6) Turn the burner on low and
constantly stir the mixture. When it starts to thicken up turn the heat up to medium and stir even more. When it starts to boil, keep boiling it for 5
minutes. You want it to be very clear and sticky (not like toothpaste though, think flubber)
7) You should now have a "gooey" substance that you can pour into a mold, or you can pour it onto a sheet of aluminum foil/silicone heat pad
to dry.
8) Depending on humidity, it should take about 1 day to dry in a sunny place. You can dry it faster by putting it in an oven set to 150 F for 1-2
hours.
Step 4Use it !
So by now you should have a glob of messy starch plastic resin that is ready to
be molded, injected, shaped, and formed into anything you want. A major
advantage to this plastic, besides the fact that it does not use petroleum, is
that it is also 100% biodegradable! That means in the right conditions, it will
decompose in months instead of thousands of years. Its time to get creative and
figure out things we can use it for.
Possibilities include:
-Plates and
dinnerware
-Plastic bags
-Cups
-Bowls
-Pens
-And whatever else you can imagine...
Plastic Milk
Recipe ingredients:
It is very helpful to view this video so you can see the process of making plastic milk.
It is a quick and easy project.
Utensils needed:
These are to the environment in that they contain no petroleum unlike usual plastics such as tupperware etc. Also instead of taking about 100 years to fully decompose it only takes about 7.
Corn startch Bio Plastic
Ingredients :
Corn starch
-Water
-vegetable/Canola (Optional)
-Wax Paper
(optional)
You will also need a microwave.And measuring tools
Step 2 Mixture
The Ratio I mixed with was 1 part corn starch and 1 part water. Feel free to change this based on the use of your plastic.
For a more rigid plastic, add more corn starch.For a more flexible/ squishy plastic add more water.
I mixed them in a sandwich bag.
If you want to add in some vegetable or canola oil (I used canola) and it will help keep it together a
little bit for every 2 cups of MIXED water and corn starch I added 1 tablespoon of oil. But of course you can change this based on your intended use
of the plastic.
Make sure to get all the bumps of corn starch out you want it to be completely dissolved It should look a bit like milk.
Step 3Microwave the mixture.
For a mixture totaling 2 cups (1 cup water and 1 cup corn starch) I nuked it for about a minute.
This of course could change based on the wattage of your microwave. I believe that mine is some wheres around 1000
to 1400 watts (ya i know thats pretty broad).
If your not sure how long to keep it in for just watch it until it turns to a solid yellow color.
The longer it is in the less flexible it will be but be careful not to leave it in to long or it will become very brittle and crumbly.
WARNING:
BE VERY CAREFUL WHEN REMOVING THE MIXTURE FROM THE MICROWAVE AS IT WILL BE VERY HOT AND MAY REQUIRE 5 MINUTES TO COOL DOWN !!!
Step 4Molding It
What I did was I put a cookie cutter on some wax paper then poured in the BioPlastic mixture before I cooked it. When i realized that it was leaking a
little I just put some tape around it and it was fine.
If you really wanted to get creative you could make a mold out of a microwaveable safe material (fired clay) and you could make some pretty neat containers.
PS . IN all BIO PLASTIC TYPES YOU CAN MAKE COLORFUL ONES BY ADDING NATURAL COLORS WHICH I HAD ADDED EARLIER LIKE THE STARS WHICH I MADE USING GREEN NATURAL COLORS AS PICTURE ABOVE
2 )Most of the materials you will need will be in your house or
can be bought at most supermarkets and home improvement stores.
POTATO BIOPLASTIC
Ingredients:
2 White skinned potatoes OR potato starch OR corn starch
water
100% Vegetable Liquid
Glycerin
White Vinegar
Natural color
Tools / Supplies:
Non stick pan
Spatula or Spoonula
Stove Top or Hot
Plate
Knife or guillotine
Optional:
blender
peeler
filter
casting
compound
Step 2 Optional: Extract the Starch
Now that you have a potato, you might be wondering just how we
will be making plastic out of this? The answer: extract the starch. How will we
do this? BLENDER! Since potatoes are about 95% starch (besides the water),
making a potato into a powdered starch form, is relatively easy.
A note to
younger viewers: be sure to ask your parents if it is alright to use a peeler,
knife and blender, and always use caution when working with exposed
blades.
1) Get a potato, and wash it.
2) Use a peeler to take all the skin
off.
3) Cut the naked potato up into cubes your blender can handle.
4) Add
about 1 cup of water and the cubes to the blender, and turn it on high for a
minute or two.
5) Use a coffee filter to strain off the cloudy water.
6) If you plan on making the plastic right away, drying the mixture is not
completely necessary, but if you plan on storing it for a while, spread it out
on wax paper in a sunny area for it to dry (it could get moldy otherwise).
Heres a suggestion by legionlabs to purify the starch extracted from the potato, by removing unwanted cellulose:
"Given only potatoes, you might be able to increase the purity of the starch for your process by removing cellulose
using this reagent, which can be made from commonly available
materials:
You can reuse the reagent by precipitating the cellulose out by acidifying the
mixture, filtering out the cellulose, and making the reagent basic
again."If you do not wish to make the starch from scratch, you can order
pre-made higher quality starch online, or buy it at your local grocery store.
Corn starch and tapioca starch also work well to make plastic with. On to step 3...
Step 3Mix it Up !
Now that you have gathered all the necessary materials and ingredients, its time
to mix up a batch of potato plastic. A note to younger viewers: be sure to have
a parent with you when using the stove, I don't want you to burn down your house
because of this instructable! Also, beware of the starch plastic resin when you
are pouring it into a mold, it is very hot and will burn you if it gets on your
skin, you can never be too cautious with boiling hot substances.
1) Measure out 60 ml (4 tablespoons) of cold water and pour it into the beaker or
container your heating the mixture in.
2) Measure out 10 grams (or about 1
tablespoon) of starch ( the potato / corn starch you made or bought) and add
that to the water.
3) Add 5 ml or about 1 teaspoon of acid (vinegar) to the
mixture.
4) Add 5 ml or about 1 teaspoon of glycerin to the mixture, more
glycerin will make it softer and more flexible, less will make it harder and
stiffer but more brittle.
5) If a colored plastic is desired, add in the natural food color you desire
6) Turn the burner on low and
constantly stir the mixture. When it starts to thicken up turn the heat up to medium and stir even more. When it starts to boil, keep boiling it for 5
minutes. You want it to be very clear and sticky (not like toothpaste though, think flubber)
7) You should now have a "gooey" substance that you can pour into a mold, or you can pour it onto a sheet of aluminum foil/silicone heat pad
to dry.
8) Depending on humidity, it should take about 1 day to dry in a sunny place. You can dry it faster by putting it in an oven set to 150 F for 1-2
hours.
Step 4Use it !
So by now you should have a glob of messy starch plastic resin that is ready to
be molded, injected, shaped, and formed into anything you want. A major
advantage to this plastic, besides the fact that it does not use petroleum, is
that it is also 100% biodegradable! That means in the right conditions, it will
decompose in months instead of thousands of years. Its time to get creative and
figure out things we can use it for.
Possibilities include:
-Plates and
dinnerware
-Plastic bags
-Cups
-Bowls
-Pens
-And whatever else you can imagine...
Plastic Milk
Recipe ingredients:
- 2 Cups Milk
- 2 Tablespoons white vinegar
It is very helpful to view this video so you can see the process of making plastic milk.
It is a quick and easy project.
Utensils needed:
- Liquid measuring cup
- Measuring spoons
- Coffee filters to absorb the liquid
- Fine weave strainer
- Spoon
- Plate
- Pan
- Cookie cutters
- Skewer not shown
- Wax paper not shown, line the plate with wax paper.
- Measure:
- Pour the milk into the pan and heat on stove. Do not boil! Heat until almost too hot to
touch but not boiling
- Add vinegar.
- Stir gently.
- Allow it to separate into globs.
- Stir again.
- Remove from the stove:
- Method:
Place the shapes on the plate lined with wax paper: - Place the shapes on a plate.
- Set in a safe warm area away from children and pets.
- Allow to dry
- Turn over after a few hours to allow the back side to dry.
- Allow to completely dry before working more with it.
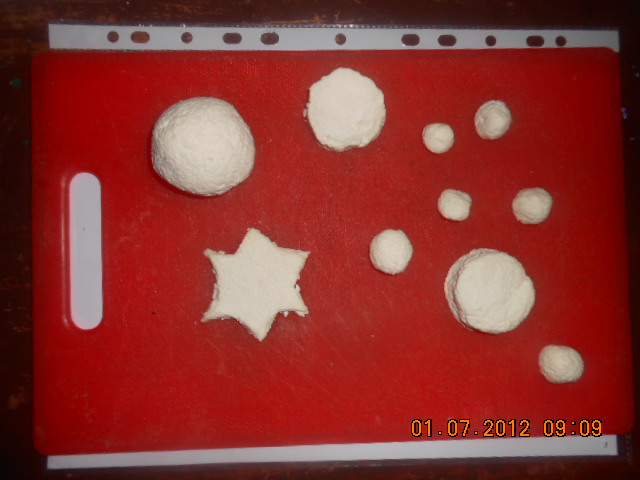
- You can make shapes from the plastic clay.
- Paint it when it is dry.
- Write on it.
- Make jewelry.
- If you can mold a perfect circle it bounces.
- Embellishments for many things.
- Gift tags.
- Dog Tags.
- Key ring tag.
- Picture frames?
- Dolls.
- Game pieces.
- Read more at http://www.instructables.com
Uses:
